Facebook's networking app has a new live streaming platform, Facebook Live and may offer the ideal solution to stream your live event. The key to the success of Facebook Live rests in having a large number of Facebook followers who frequently engage with your content. Further, Facebook Live limits your virtual broadcast to a single host. It's simple to get started, and you can easily post your stream to a Facebook Page or Group to further the reach of your broadcast. Let's examine how to stream a live event on Facebook. We'll review options for streaming, and how to engage your audience before, during, and after your show.
Facebook Live streaming software allows viewers to react or comment on your broadcast as it happens. If you plan to interact with your audience verbally or visually during your virtual event, it is important to note that this is possible using Facebook Live but you will have to broadcast from an external video conferencing software such as Zoom or BlueJeans.
What you need to stream events using Facebook Live
For the sake of simplicity, we are going to stick to live streaming from your phone (iOS and Android) or your laptop as a single host. (If you are interested in more advanced video production, Facebook Live Producer does enable you to use high-end production equipment and streaming software.) To live stream an event from your phone or laptop, all you need is a webcam, microphone, and speakers.
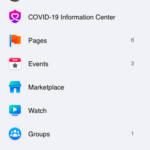 Using your phone or laptop, you can broadcast to your organization’s Facebook Page or to your Facebook Group using Facebook Live. If you already have an active following on Facebook, we recommend using Facebook Live to broadcast your first virtual event. However, you can create an account and link it to a Page or Group from the navigation menu on the left-hand side of your Home page.
Where to broadcast your virtual event
If you want to sell tickets to your live Facebook stream, broadcasting to a private Group might be the best option for controlling access to paid attendees only. You can stream a live event from your Facebook Page, but be aware of the fact that anyone who has the link to your page can your broadcast without having purchased tickets to the show. If your main goal for live streaming is to create a bigger following on Facebook or if you want to deliver free content to your patrons in order to stay front-of-mind during stay-at-home orders, broadcasting from your Facebook Page may be the perfect option for you.
If you already have a great following on your Facebook Page but you would still like for your virtual event to be paid (and thus private), then utilize your Facebook Page to promote your private broadcast to your Facebook Group. Be sure to include the link to purchase tickets from Facebook, or ask us to install the ThunderTix app into your page, so your customers can purchase tickets while logged into their Facebook account.
In ThunderTix, include a link to your Facebook Group in the confirmation email receipt along with important date and time information for the event. If you use email reminders for the event -- and we highly recommend them for virtual events, be sure to include the link there, too. Paid attendees can follow the link and submit a request to join the private Facebook Group. You can crosscheck your Guest List with attendees effectively growing your Facebook Group.
Streaming from a Group loses some of the capability that live streaming from a Page allows such as the ability to crosspost to another page, access detailed insights in Creator Studio, and live stream to specific geographic regions or age demographics. If you do broadcast from a Page, you can find statistics under Facebook Live > Audience Settings.
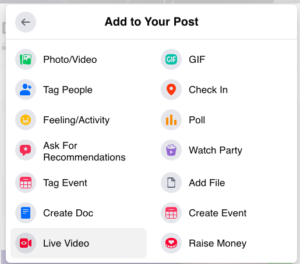
To broadcast your live event from a Facebook Page, simply click the Live button represented by the video camera beneath the Create Post button.
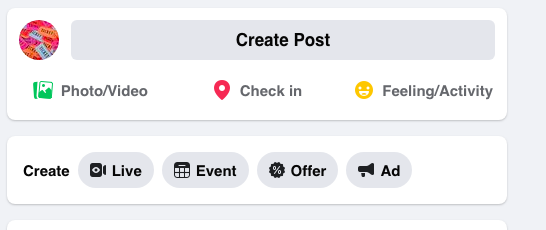
To broadcast your live event to a private Facebook Group, begin your post using the “What's on your mind?” input area of the page.
How to increase attendees for your live event
If you already have an active following on your Facebook Page, it easy to get the word out about your virtual event even if you decide to broadcast it to a private Group. Facebook offers several internal methods for promoting your virtual event including:
- Post to your Page, personal Profile, or other Facebook Groups. For broadcasting to a private Group, be sure to include a link for patrons to purchase tickets but don’t forget to include a link to your Group in the email confirmation.
- Thoughtfully ask your followers to share your virtual event post.
- Schedule your live stream at least one week in advance so that patrons can select to receive a notification before you begin streaming.
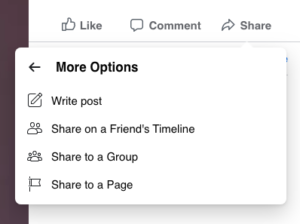
- If you are live streaming to a Page, consider crossposting to other Pages to encourage new patrons to attend.
- Use Facebook’s Watch Party feature and encourage relevant groups or people associated with your page to host a Watch Party for your live broadcast.
- If you're virtual event is open to all, embed the live event stream to your website or blog and make it available for others to embed your broadcast into their website or blog.
Of course, you can also use traditional marketing methods that you would use for in-person events such as mass email campaigns or other social media posts that drive patrons to your live event stream. Be sure to include relevant links to your Facebook Page or Group. Though if you are looking to create a private Group, we recommend only including this link in a confirmation email to patrons (rather than advertisements) that have purchased tickets to make it easier to filter Group requests so that you are only accepting those who have already paid.
Other useful Facebook Live features
Facebook Live offers a range of useful features from engaging your audience with quick polls to helpful video editing tools that will help you to promote your next virtual event. Here is a quick overview of some additional Facebook Live tools:
- Schedule your live broadcast in advance: as mentioned previously, you can schedule a live stream in advance and inform your patrons about your upcoming event. It's important to include a reminder so patrons receive a notification just ahead of your start time to connect with your show. (ThunderTix can handle this automatically.) When you schedule an event, two posts will automatically be created: an announcement post that will inform followers about your scheduled event and live broadcast post that will begin at your scheduled start time.
- Moderated chat: Facebook Live’s moderated chat gives you more control over your group chat discussion.
- You can adjust your settings so that comments only appear every 10 seconds
- Your chat will only show comments of at least 100 characters
- Only your followers can comment
- Viewers must have an account that is at least two weeks old to comment
- Or commenters must have followed you for at least 15 minutes
- Polling and Questions: Use Facebook Live’s polls and questions to include your audience in the broadcast. Open-ended questions help provide insight you may not have considered. Or use polls with pre-populated answers on subjects for which you hope to learn the popularity of a given subject.
- Screen sharing: Facebook Live does allow you to screen share so that patrons can see how you are moving about your own page. Perhaps this could be useful for setting a timer until your video starts, however, switching between webcam video and screen share isn’t possible unless you end your broadcast and begin again without the screen share tool.
- Creator Studio: Facebook Live’s Creator Studio will enable you to clip your videos so that you can hone in on highlights for promotional sharing later.
- Donation Collection: If you are a nonprofit or charitable organization, you can go through Facebook Live’s approval process to collect donations after promoting your cause in your virtual event. Of course, you can also collect donations through your ThunderTix account and there is no approval process needed to start collecting donations immediately.
- Streaming Software: Facebook live does provide tips and input on how you can include graphics or use streaming software for high-end production.
Facebook Live offers tips for before, during and after your stream on Facebook Live along with guides to help you plan for the largest virtual events.
Facebook emphasizes the need to secure a good Internet connection with a backup connection on hand, scheduling your broadcast by making an announcement via Facebook Live. Keep your stream between 3 minutes (so that attendees have time to tune in) and 8 hours. Facebook Live ends videos automatically after 8 hours, so if you need more time, then schedule your video in parts.
Start your broadcast early to allow people to filter in and consider a count-down to indicate when your broadcast will begin. Familiarize yourself with the features that appear while broadcasting from your phone or laptop (different for each) - this is especially important if you plan to use streaming software to include graphics. Test graphics usage to ensure there is no overlap with the comment scroll, Live badge, or concurrent view count, and rehearsing your broadcast by selecting “Publish as a test broadcast” where only fellow admins and editors can view the post.
If you are interested in how to stream a live event on Facebook with ThunderTix please sign up today with no credit card required. You'll experience superb support as we walk you through creating your first live stream today!
